Git and GitHub for collaboration
As a company working in a collaborative way with our computers on a daily basis, using Git is an important step to improve clarity, reliability, and efficiency in our work. Since we all have different backgrounds, Git might seem a bit overwhelming at first, but once you get the hang of it, it will make our collaboration much smoother and more effective.
This document introduces Git in a simple and practical way, explaining how to use it in our daily work with RStudio.
What Are Git and GitHub?
Git
Git is a version control system (VCS) that helps track and manage changes to files in a project. It allows multiple people to work on the same project without interfering with each other’s changes.
Why use Git?
- Keep a history of changes: You can see what has been modified at any point.
- Avoid losing work: If you make a mistake, you can go back to an earlier version.
- Work with others without conflicts: Changes from different people can be merged smoothly.
GitHub
GitHub is an online platform that hosts Git repositories. It allows us to store our projects online, collaborate easily, and keep track of progress.
Why us GitHub ?
- Store our code online so we can access it from anywhere.
- Collaborate with teammates, seeing who changed what.
- Review and discuss changes using issues and pull requests.
- Work on features separately using branches and merge them when they’re ready.

Interactions Between Git and GitHub
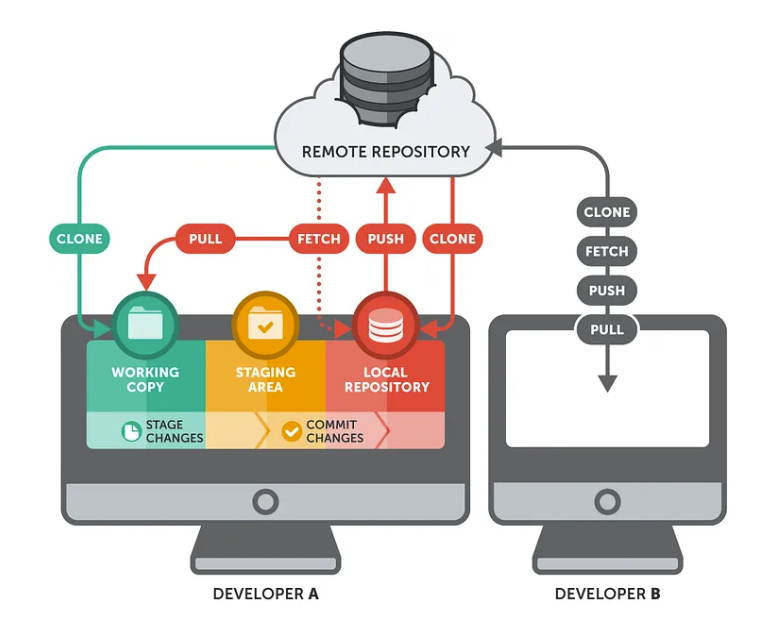
Your project can exist in different locations: - Your local computer (working directory) , where you work on files. - The staging area, where you prepare changes to be saved. - The local repository, where changes are saved on your computer. - The remote repository (GitHub), where your changes are shared with teammates.
We use different actions to move files between these locations. In RStudio, there’s a user-friendly interface to do this without needing to use the command line.
Setting Up a Project with Git
Clone an existing repository
To work on a project that already exists as a repository on GitHub, you can clone it to your computer. This creates a local copy that is connected to the remote repository.
- Open RStudio and go to
File > New Project > Version Control > Git. (steps 1,2,3 from Figure 1) - Copy the repository URL from GitHub (button “clone”) and paste it into the dialog. (step 4)
- Choose where to store the project on your computer and click “Create Project”. (step 5)
- You now have a local copy of the project that is connected to GitHub. (step 6)
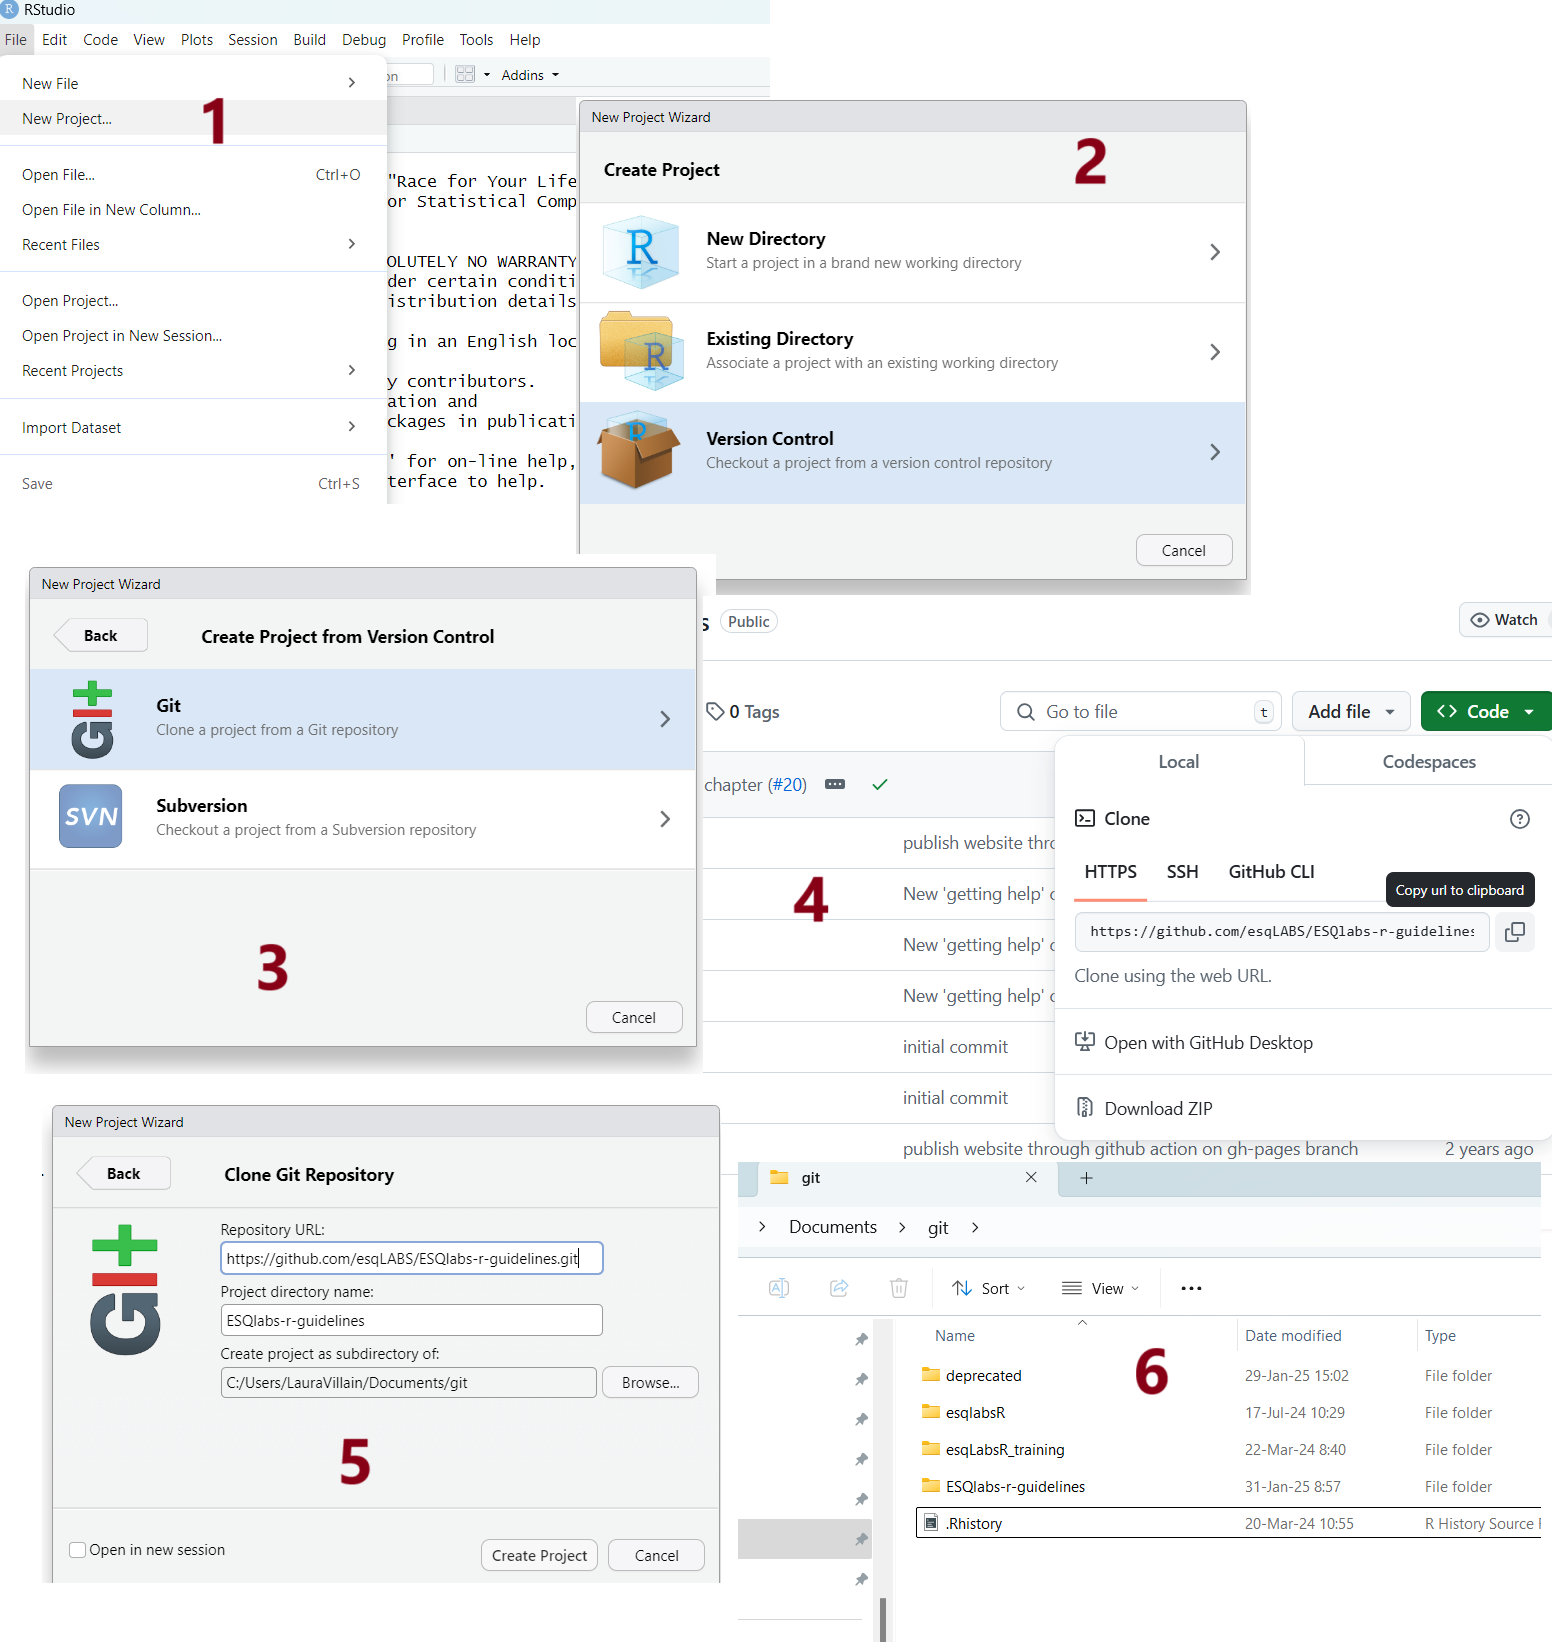
Never clone a repository on a cloud synced directory (onedrive, sharepoint…). Clone it to a regular user directory like C:/User/Documents/.
Create a new local repository
- Create a new RStudio project (
File > New Project > New Directory). - Check the “Create a Git repository” box.
While a local repository can be connected to a GitHub repository latter, it is rather recommended to first create the repository on Github, then clone it using the the previous method. Should you still need to connect a local repository to a GitHub repository, use the usethis::use_github() function.
Git Collaboration Process
Understanding File States
Your files can be in different stages:
- Untracked: New files that Git is not managing yet. It’s on your computer but not shared, these files don’t exist on GitHub
- Modified: Files that have changed but are not yet staged. It’s also on your computer, there is a different version on GitHub of that file. Both Untracked and Modified files are in you Working copy
- Staged: Files that are ready to be committed. You have “added” them, you can still reverse that step. The files are in the Staging area
- Committed: Files saved to your local Git history. You have created a “commit” with a message. They are in you Local repository
- Pushed: Changes uploaded to GitHub and shared with others. They are now in the Remote repository.
In practice, you work on your files and documents, and once you are happy about them, you generally do the last three steps at the same time.Even when you have pushed your work, you can still restore the project to a previous commit.
Then another developer can get access to what you have shared on his own local repository.
if you don’t commit a document and modify it later, the git environment won’t have a trace of your previous modifications. If you want to keep trace of it, you can commit, and still reverse it later if you changed your mind.
The Git Workflow
When working with Git, we go through several steps:
Edit files in RStudio, or where you want if it’s not an R code, then save them.
Stage the files: Select the files you want to save in the “Git” panel of RStudio and click “Add”.
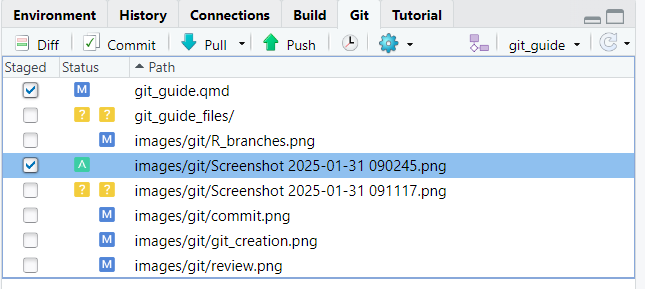
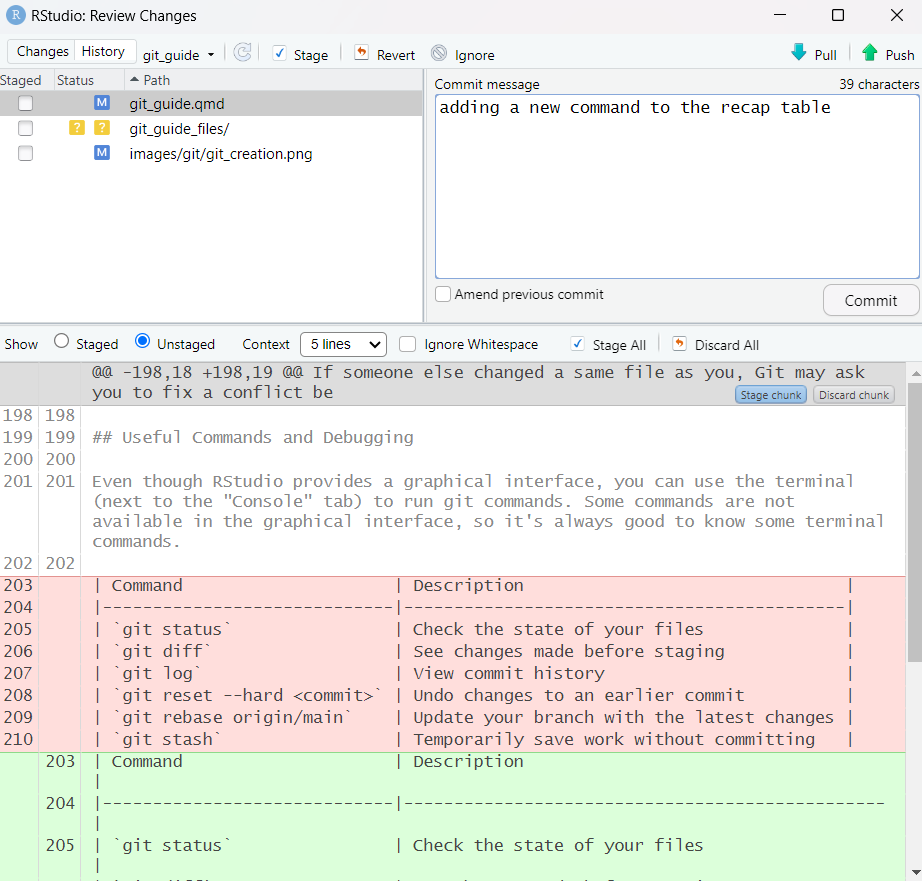
- Commit the changes: Click “Commit”, write a short message describing what you did, and confirm. Before the commit, you can also look at the changes from the last commit and review what you have done.
- Push your work to GitHub by clicking “Push”. Now your changes are shared!

- Pull updates from teammates before you start working, by clicking “Pull”. This keeps your version up to date.
try to always pull before you start working. If you are two working on the same document at the same time, you might create conflicts (see later for resolution), meaning that you have modified the same part of a file but with different things. If you want to share your document after your coworker pushed, you’ll be the one to have to resolve the conflict!
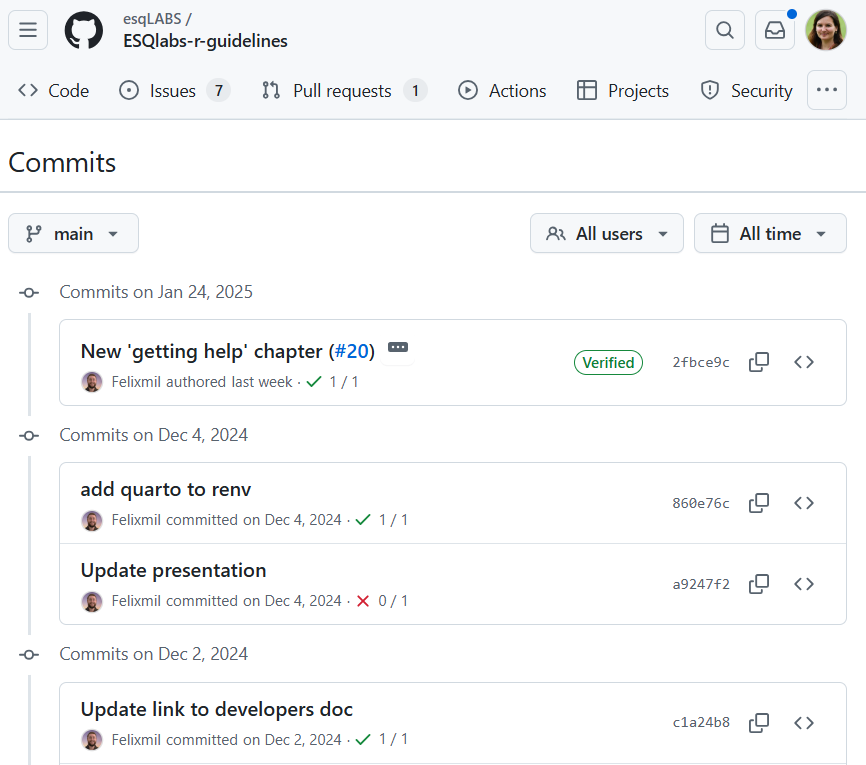
On GitHub, you’ll be able to see the list of all commits on a project. If you want to see what had been done on each commit, you can click on it, and have the exact list of modified files. Using the commit number associated, you can always restore your project to a previous commit.
Working with Branches
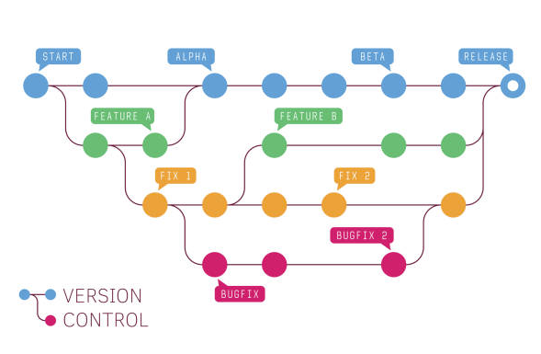
Why Use Branches?
Branches let us work on new features without affecting the main version of the project. For example, if you are fixing a bug or adding a feature, you can do it on a separate branch and merge it when it’s ready. You can still enjoy the collaboration process, but without impacting the main code.
How to Work with Branches in RStudio
- Create a new branch: In the “Git” pane, click on “New Branch”, name it, and switch to it.
- Work on your changes: Edit files as usual.
- Commit your changes: Stage and commit your work.
- Push your branch: Click “Push” so your branch is visible on GitHub.
{usethis} package
the {usethis} package contains a family of function starting with pr_* (PR stands for Pull Request).
- Start by creating a new branch with
pr_init()to create a new branch, - Commit and push just like you would normally,
- When your branch is ready to be shared, run
pr_push()to push your branch to GitHub, - Once the branch have been reviewed and merged, you can delete it with
pr_finish().
All branches will be visible on the R panel. You need to pull to access to the branch created by someone else!
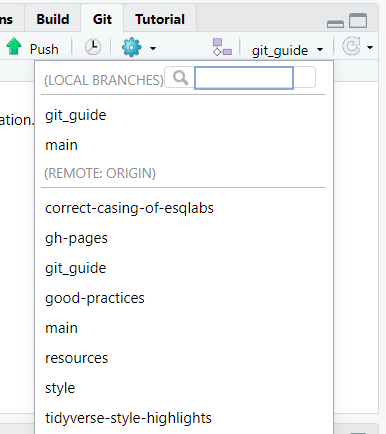
You’ll also find the list of branches on github, where you can find the shared version of the files the branch you want.
Merging and Code Review
Reviewing Changes Before Merging
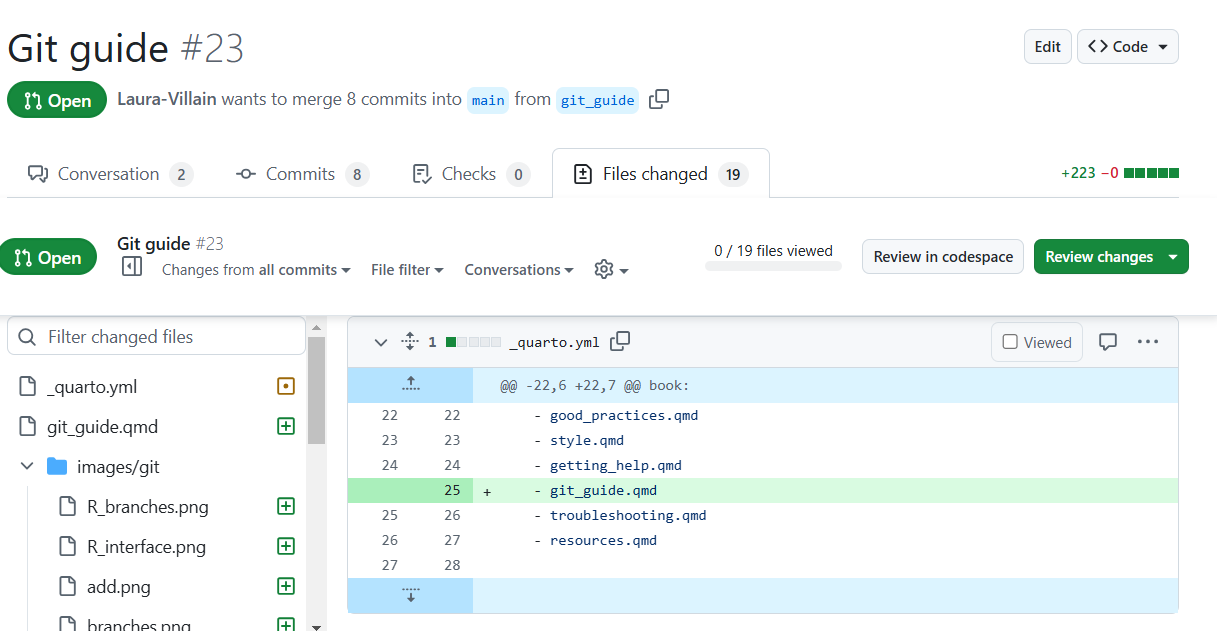
When a branch is ready, someone else should review it before merging, to ensure that all changes are correct. The reviewer will be able to see the exact changes made, and to comment on those if necessary On GitHub:
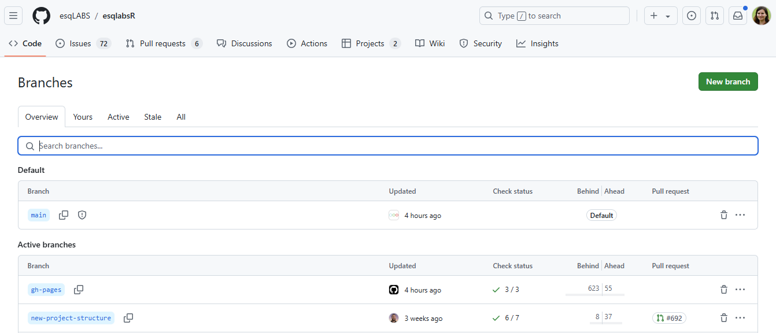
1. Open the repository and go to the “Pull Requests” tab.
2. Click “New Pull Request” and select the branch.
3. Assign a reviewer who will check your changes and give feedback.
4. Once approved, click “Merge” to integrate the changes.
Resolving Conflicts
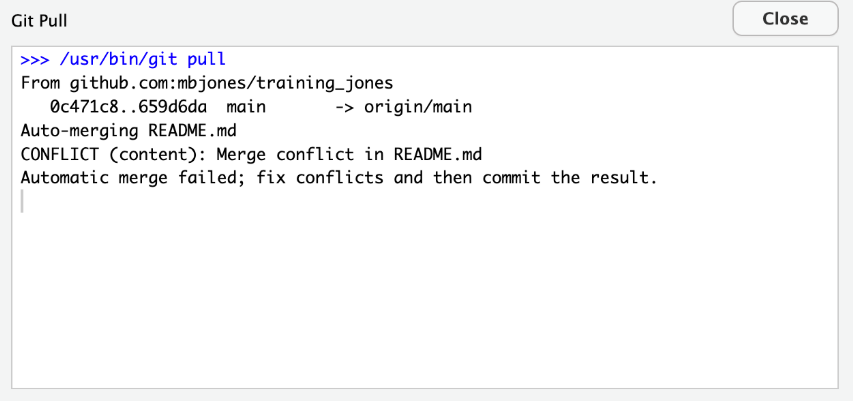
If someone else changed a same file as you, Git may ask you to fix a conflict before merging or before a pull.
Open the conflicting file in RStudio.
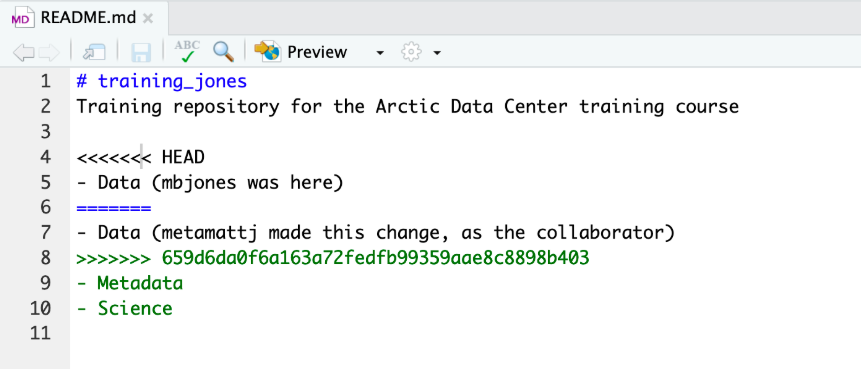
Look for conflict markers (
<<<<<<<,=======,>>>>>>>).Choose the version you want to keep: combine code and delete unwanted markers and unwanted code.
Save the file and commit the fix.
Good Practices
- Git folder: Create folder for your git projects.
- Commit Often: Save small changes frequently instead of big ones.
- Write Clear Messages: Describe what each commit does.
- Pull Before Pushing: Always get the latest changes before adding yours.
- Communicate: Let people know when you created a new branch or made an important commit.
- Use Branches: Keep your main branch clean and stable.
- Ask for Reviews: Another pair of eyes helps prevent mistakes.
Useful Commands and Debugging
Even though RStudio provides a graphical interface, you can use the terminal (next to the “Console” tab) to run git commands. Some commands are not available in the graphical interface, so it’s always good to know some terminal commands.
| Command | Description |
|---|---|
git status |
Check the state of your files |
git diff |
See changes made before staging |
git log |
View commit history |
git reset --hard <commit> |
Undo changes to an earlier commit |
git rebase origin/main |
Update your branch with the latest changes |
git stash |
Temporarily save work without committing |
git stash pop |
Get the modifications you stashed appear again |
For more debugging tips, check Happy Git with R.
If you are stuck, you can also write in the Git Support channel!
Conclusion
Git helps us work together effectively, keeping track of changes and ensuring smooth collaboration. Using RStudio’s Git interface makes it even easier. By following these steps and best practices, we can maintain a clean and efficient workflow!